Hexo 教學 (Hexo Tutorial)
Hexo 使用教學與客製化主題分享。
安裝需求
安裝
Hexo
1 | sudo apt install npm |
建立 Hexo 基本檔案
1 | hexo init <folder> |
icarus 主題
預設主題
1 | git clone https://github.com/ppoffice/hexo-theme-icarus.git themes/icarus |
客製化主題
1 | git clone https://github.com/MeowLucian/MeowLucian.github.io_Hexo_Theme.git themes/icarus |
更新
當原作者更新功能時,將自己客製化異動的檔案暫時使用stash 封存。
1 | git add . |
查詢目前有哪些 stash。
1 | git stash list |
再將原作者 remote 的新資料 pull 下來。
1 | git pull |
之後再將 stash 的資料 apply 或 pop 回來。
1 | git stash pop stash@{0} |
外掛
hexo-deployer-git : deploy 上傳
1
npm install hexo-deployer-git --save
Json-content : 用於站內搜尋功能
1
npm install -S hexo-generator-json-content
Sitemap : 用於產生網站地圖關鍵字功能
1
npm install hexo-generator-sitemap --save
hexo-hide-posts : 隱藏特定文章
1
npm install hexo-hide-posts --save
設定
主題
編輯根目錄下的 _config.yml
1 | theme: icarus |
文章封面圖
7:3 比例呈現
網址連結
編輯根目錄下的 _config.yml
- Github Page 發佈 :
1
url: https://<yourname>.github.io
- 正式發佈 :
1
url: http://brain-garden.tw/
404 頁面
將index.md和404 資料夾放在主題的source 文件夾下就行了。注意在 Local 本地端測不出來;但發布在 github 上後就可以正常讀取了。
1 | |-- source |
執行指令
產生 about 頁面
1 | hexo new page about |
使用 Hexo 產生靜態檔案
1 | hexo g |
開啟 Server
1 | hexo s -p 3600 |
-p : 連接埠設定
瀏覽網頁
Deploy 到 Github
1 | hexo clean && hexo d |
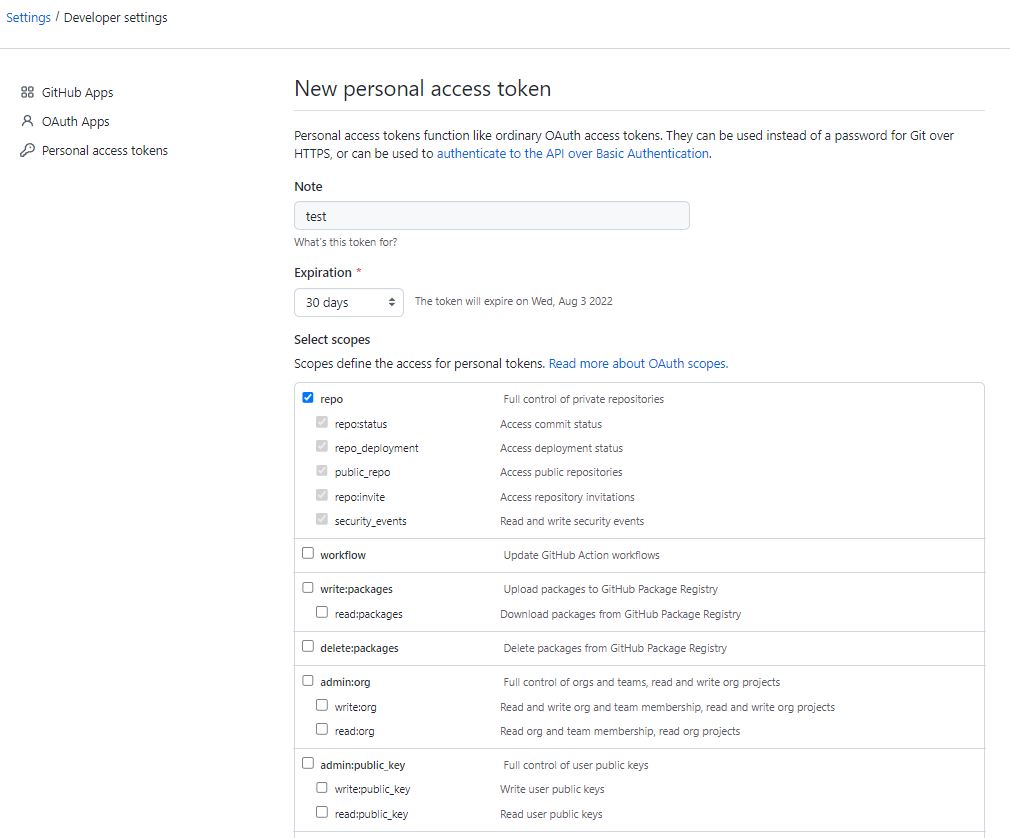
Git 已取消使用密碼登入,故需要使用 SSH token 方式上傳
Github 右上角個人 Icon -> settings -> Developer settings -> Personal access tokens -> Generate new token
Note 欄位可隨便命名,基本上有個意義就好
Expiration 強烈建議不要改為永久,可設定一個月,並頻繁使用
權限部分因為只有用 blog,權限不須太大
最後編輯根目錄下的 _config.yml 加入 token: 關鍵字
產生 Sitemap
到根目錄的
_config.yml中的# Site分類底下添加 :1
2sitemap:
path: sitemap.xml輸入 https://localhost:3600/sitemap.xml,查看所產生的 sitemap。
完成後同樣將
# Site分類底下keywords添加關鍵字 :1
keywords:
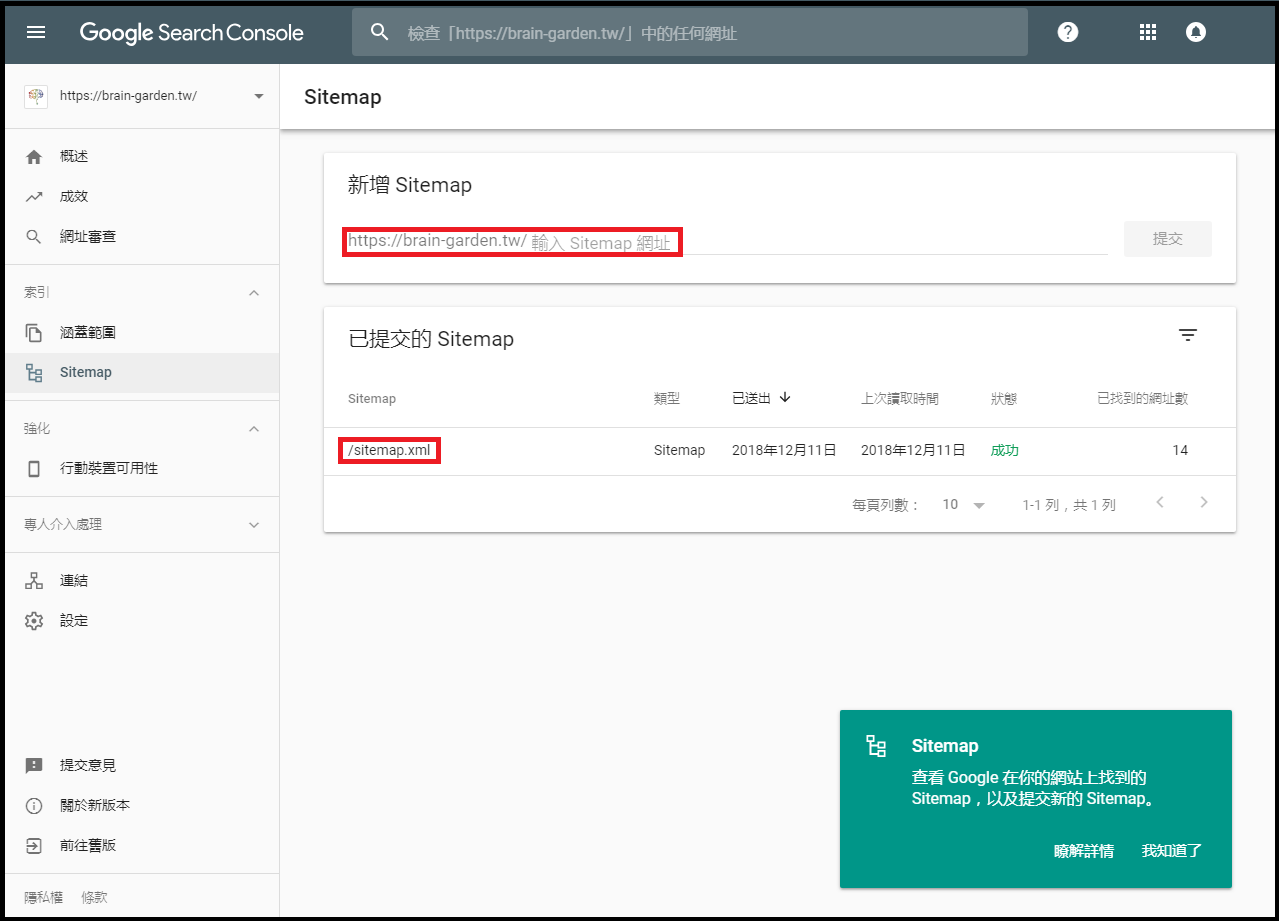
最後別忘了在 Google Search Console 提交剛剛所產生的 Sitemap 資訊 :
註解
個人放置網頁的 Repository 上有特殊檔案不會自動產生,請不要刪除或被更新的網頁覆蓋掉
README.md: Github Repository 說明檔案CNAME: 網站轉址檔案googleccd03104bd8b0cd5.html: Google Search Console 驗證檔案
Hexo 教學 (Hexo Tutorial)


